





How to Flush a Water Heater: A Step-by-Step Guide

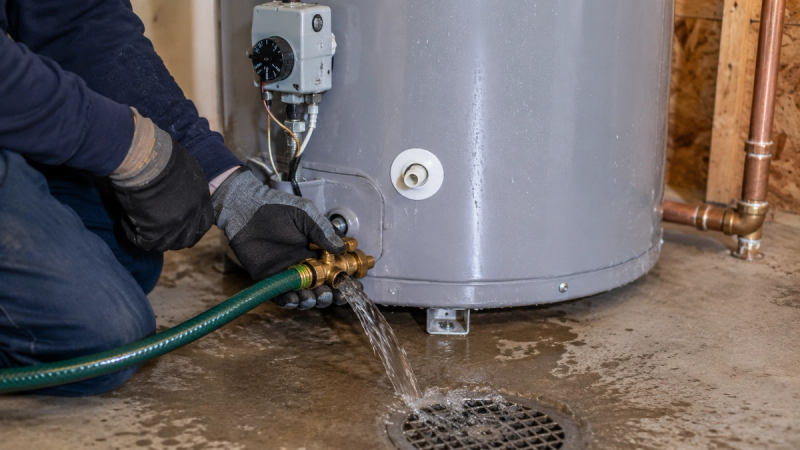
Flushing a water heater means draining the tank to remove sediment buildup that collects over time. This maintenance task helps restore heating efficiency, reduce noisy operation, and extend the life of a traditional tank water heater. Most homeowners can complete the process in about an hour with a garden hose and basic safety precautions.
Why You Need to Flush Your Water Heater
When minerals like calcium and magnesium in hard water heat up, they drop out of suspension and sink to the bottom of the tank. That sediment acts like a barrier between the burner or lower heating element and the water itself.
As that layer thickens, it creates several noticeable problems:
- Longer reheat times and higher monthly utility bills
- Popping, rumbling, or hissing sounds during operation
- Uneven or lukewarm water temperatures
- Premature tank fatigue and bottom leaks
- Reduced usable capacity, meaning you run out of hot water much faster
Regular flushing removes sediment buildup, helping the heater transfer heat more effectively and reducing wear on internal components.
How Often to Flush Your Water Heater
Most manufacturers suggest flushing a standard tank once a year. If you live in an area with particularly hard water, manage a larger household, or notice sediment symptoms returning quickly, bump that schedule to every six months.
Note: The steps below apply to traditional tank-style heaters. Tankless units operate differently, and we cover those at the end.
What You Need Before You Start
- A garden hose long enough to reach a floor drain, an outdoor exit, or a large bucket
- Heavy work gloves because the water inside will be very hot
- A flathead screwdriver or channel-lock pliers in case the drain valve is stuck
How to Flush a Water Heater, Step by Step
1. Cut the Power Supply
Safety comes first. If you have an electric water heater, flip the circuit breaker off at your main electrical panel. Never drain a tank while the upper or lower elements are powered, or you will burn them out instantly. For a gas unit, turn the gas control valve to the pilot position or follow the manufacturer’s instructions for shutting off the gas supply.
2. Turn Off the Cold Water Inlet
Locate the cold water pipe coming into the top of the tank and close its shutoff valve. This stops fresh water from entering and refilling the tank while you are trying to empty it.
3. Hook Up the Hose and Open a Faucet
Before connecting the hose, inspect the drain valve for signs of corrosion or leaks. If the valve appears damaged, heavily corroded, or does not operate smoothly, do not force it open.
Screw your garden hose tightly onto the brass drain valve at the base of the tank. Run the other end to a suitable drainage point. Next, go inside the house and turn on a hot water tap at the sink closest to the unit. Opening a faucet introduces air into the plumbing lines, allowing the tank to drain smoothly.
4. Open the Drain Valve
Slowly open the drain valve and allow the tank to empty. The water inside the heater may be extremely hot, use caution while draining and keep the hose outlet pointed away from yourself and others to prevent burns.
5. Rinse Out the Remaining Sediment
With the drain valve still open, briefly open the cold water supply valve for 15–20 seconds at a time. Then shut it off and allow the tank to drain again. The incoming water pressure helps loosen remaining sediment and push it out through the hose. Repeat this process until the water running through the clear section of your hose looks completely clean and free of grit.
6. Close Up and Refill the Tank
Once the runoff runs clear:
- Close the drain valve tightly and disconnect your garden hose.
- Turn the main cold water supply back on all the way.
- Leave the indoor hot water faucet running until it flows in a steady stream without sputtering, which confirms the tank is refilled and helps prevent trapped air from affecting operation
- Restore power by flipping the breaker back on for an electric unit, or relighting the burner on a gas unit.
Never turn power back on to an electric water heater until you are certain the tank is full. A dry heating element fails within seconds.
7. Test the System
Give the tank 30 to 60 minutes to reheat the fresh water. Run a hot tap to verify you have full temperature and clear water with no unusual odors.
How to Keep Sediment From Coming Back
Beyond regular flushing, a few maintenance steps can slow mineral buildup and protect the tank between cleanings:
- Lower the thermostat: Setting your tank to 120 degrees Fahrenheit slows down how fast minerals precipitate out of the water while still providing plenty of heat for daily chores.
- Install a water softener: Homes dealing with severe hard water benefit greatly from a whole-house softening system that removes minerals before they reach the appliance.
- Add an expansion tank: Thermal expansion puts constant physical stress on a storage tank during heating cycles, and an expansion tank absorbs that pressure.
- Schedule professional tune-ups: If you prefer to leave anode rod inspections and safety checks to a professional, our water heater installation and repair services provides routine tune-ups to help identify corrosion, maintain efficiency, and catch potential problems before they lead to unexpected failures.
How to Flush a Tankless Water Heater
Tankless units do not store water in a reservoir, meaning they avoid traditional bottom sediment buildup. However, hard water can still scale up the internal heat exchanger.
Before flushing, turn off power to the unit, shut off the gas supply if applicable, and close the isolation valves according to the manufacturer’s instructions.
Flushing a tankless system requires a dedicated descaling kit, a small utility pump, a bucket, and food-grade white vinegar or a manufacturer-approved descaling solution. The solution is circulated through the unit for roughly 45 minutes to dissolve mineral scaling. Because specialized isolation valves and pump connections are required, many homeowners prefer having a professional handle this process.
When Flushing Is Not Enough
A thorough flush clears out sediment, but it cannot reverse structural damage. If you have already flushed the unit and still deal with discolored rusty water, persistent leaks around the base, or a system that has surpassed its expected service life, the tank may be too far gone. For more details on spotting structural failure, read through our guide on 5 signs your water heater needs a replacement.